

Tommee Tippee Breast Pump — A Comprehensive Guide for Modern Parents
Choosing a Tommee Tippee pump? This guide compares double electric, wearable, single electric, manual, and silicone milk collectors, then walks you through flange sizing in millimeters, step-by-step setup, cleaning and storage basics, travel power tips, parts care, and common fixes—so every session feels simpler, safer, and more productive.
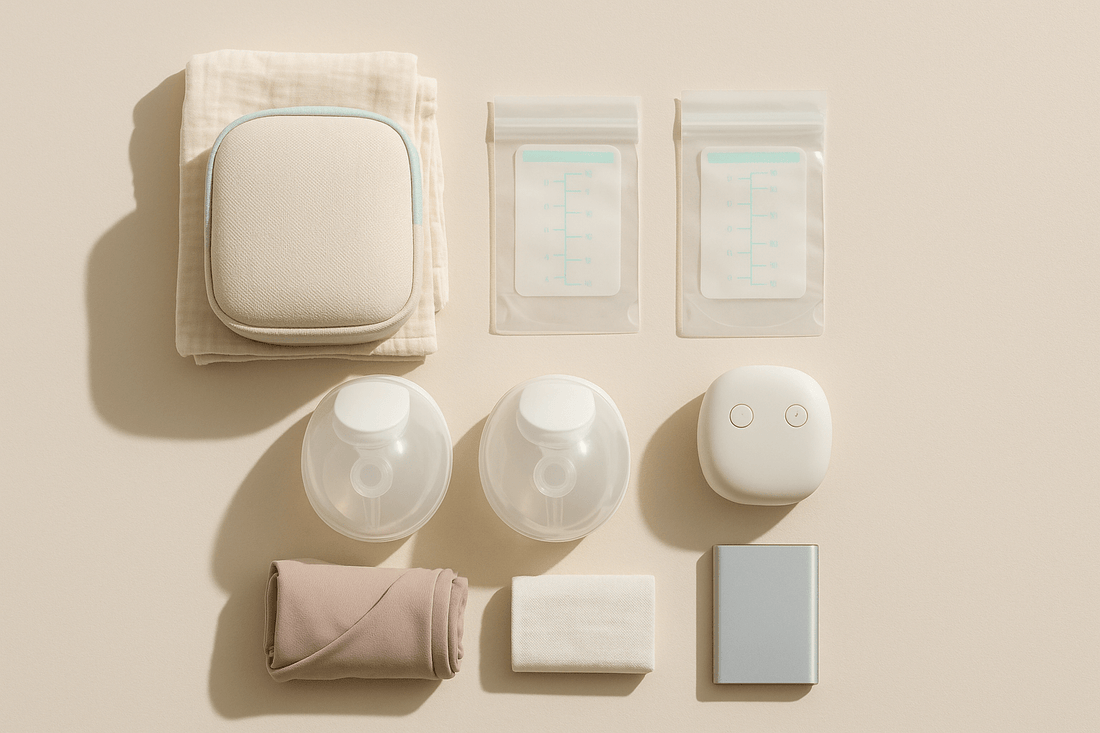
Model lineup at a glance
| Type | What it offers | Best for |
|---|---|---|
| Double electric | Hands-free bra compatible, 2-phase rhythms (stimulation → expression), multiple levels, closed-system style parts | Daily power sessions, return-to-work routines |
| Wearable (in-bra) | Cord-free mobility, discreet cups, 2-phase patterns, multiple levels, portable charging | School runs, chores, moving between rooms |
| Single electric | Lightweight motor, simple controls, affordable entry | Occasional pumping, compact travel kit |
| Manual | Quiet, inexpensive, no power needed; quick relief | Let-down stimulation, occasional outdoor use |
| Silicone milk collector | Passive suction on the opposite breast; catch let-down | Boosting stash while nursing on the other side |
Note: Exact bundles, levels, and accessories vary by retailer/region. Always follow your unit’s manual.
How to choose (use cases)
- Returning to work: Prioritize double electric or wearable; keep spare valves and a small cooler for storage.
- At-home flexibility: Wearable for movement + plug-in double for stronger, predictable sessions.
- Occasional pumping: Single electric or manual; add a silicone collector to bank let-down.
- Night feeds: Quiet double or manual; prep assembled parts before bed to reduce setup time.
- Small spaces/travel: Wearable/single + compact drying mat and bottle brush in a zip pouch.
Flange sizing (mm) & fit signals
Fit drives output. Measure your nipple diameter in millimeters (exclude areola) and choose the closest available size—for each breast (they can differ). Start with your measure plus ~1–3 mm, then test at low levels for 2–3 minutes.
| Nipple diameter (mm) | Start with (mm) | Fit notes |
|---|---|---|
| 12–13 | 15 | Check for rubbing; nipple should glide freely |
| 14–15 | 17 | Minimal areola pulled in; no whitening |
| 16–17 | 19 | Re-center 2–3 minutes into expression |
| 18–19 | 21 | If flow stalls, try one size down |
| 20–21 | 24 | Too much areola in tunnel → consider smaller |
- Too small: scraping, blanching, “lipstick” shape post-pump.
- Too big: areola pulled deep, swelling, inconsistent suction.
- Elastic nipples: Size closer to your exact diameter; avoid very high suction.
Setup & first session
- Assemble & seal: Seat valves/diaphragms fully; push tubing onto barbs; check backflow parts are snug (closed-system style).
- Center & support: Align the nipple; hold shields level; use a pumping bra to maintain seal.
- Start low: Begin in stimulation; once milk flows, switch to expression and increase one step at a time.
- Hands-on help: Gentle compressions can improve drain and comfort.
- Session length: Many parents finish in ~15–20 minutes; stop when comfortably empty.
Wearable tips (in-bra)

- Use a supportive, non-compressive bra; center the nipple carefully inside each cup.
- Stand upright or slightly reclined to avoid spillback; keep cups level while walking.
- Pack spare valves and a soft pouch; empty into bottles/bags before removing the bra.
- If output feels lower vs. plug-in sessions, add one short “power” session daily on a double electric.
Cleaning & safe milk storage
- After each session: Wash milk-contact parts with hot, soapy water; rinse and air-dry. Sanitize as your manual allows.
- Storage basics: Room ≤25 °C (77 °F) up to 4 h • Refrigerator up to 4 d • Freezer ~6 m best (≤12 m acceptable).
- Thawed milk: If thawed in fridge, use within 24 h; don’t refreeze; avoid microwaving.
- On the go: In an insulated cooler with frozen ice packs, milk typically stays cold for ~24 h—transfer at destination.
Parts care & replacement cadence
Output often rebounds when you refresh wear items:
- Duckbill valves/membranes: ~4–8 weeks of daily use or sooner if gaping/tears appear.
- Tubing: Replace if moisture won’t dry, discolors, or loosens at connectors.
- Shields/cups: Swap if warped/cracked or if comfort declines despite correct sizing.
- Backflow parts: Replace after drops or if seals loosen.
Travel, power & workday routine
- Power: Keep a small power bank/charger for wearables; for plug-in models, a short extension cord helps at work.
- Workday kit: Pump + parts, spare valves, pumping bra, 4–6 bottles or bags, cooler with ice packs, wipes, mini soap, foldable drying mat.
- Flight tips: Pumps are allowed in carry-ons; breast milk and ice packs are typically permitted—check current airline guidance.
Troubleshooting (advanced)
- Weak suction: Reseat valves/diaphragms; push tubing fully; ensure lids are closed; refresh valves.
- Milk in tubing: Replace affected tubing; inspect backflow parts; keep cups/shields level.
- Uneven output: Different sizes per side are common—test one size up/down on the lagging side.
- Soreness: Drop one level; insert a brief stimulation burst mid-session; reassess flange size; shorten session and add one more daily.
- Condensation: Run the motor 1–2 minutes unattached to dry lines before storage.
Buyer checklist
| Need | Prioritize | Why |
|---|---|---|
| Return-to-work routine | Double/wearable + spare valves | Consistency and uptime |
| Small apartment/travel | Wearable/single + compact kit | Packs small, quick setup |
| Comfort-sensitive | Adjustable levels, soft rim shields | Protect skin, reduce friction |
| Budget | Single/manual + silicone collector | Catch let-down; lower upfront cost |
Comfort between sessions
Early tenderness often improves with correct fit, moderate suction, and warm compresses. Between sessions, some parents use reusable silver nursing cups for surface comfort—always remove before nursing or pumping.
FAQ
Are wearables as strong as plug-in doubles?
Wearables prioritize mobility; many parents keep both a wearable and a plug-in double for “power” sessions.
Which bottles work best?
Start with the brand’s own narrow/wide-neck options or use adapters. Test for leaks before relying on new combos away from home.
Do I need different flange sizes per side?
Often yes. Fit can vary by 1–3 mm between breasts; choose comfort and output over symmetry.
How long should sessions be?
Typical double sessions last 15–20 minutes, but stop when comfortably empty—consistency beats intensity.