
How to Choose The Best Nipple Shields for Breastfeeding
Nipple pain, cracks, and latch struggles can make breastfeeding feel tough—sometimes even discouraging. If sore nipples turn feeding into a dreaded chore instead of a bonding moment, you're not alone.
Nipple shields can offer practical relief when used the right way. But picking the wrong size or material? That can just add to the frustration.
The best nipple shield fits your nipple snugly (not too tight), lets milk flow well, and helps your baby latch without hurting already-sensitive skin. It should feel comfy during feeds, stay put, and not create new soreness.
Let’s walk through sizing, materials, and real-life tips. You’ll find out when shields help, how to use them safely, and what to look for so you can make the best choice for you and your baby.
Understanding Nipple Shields and When to Use Them
Nipple shields are thin, flexible covers that go over your nipple and areola during breastfeeding. They create a gentle barrier to protect sore nipples while still letting milk reach your baby.
Most modern shields use soft silicone and come in different sizes. That means you can usually find one that fits your breast shape.
Healthcare providers often suggest shields for certain situations. Cracked or very sore nipples get a break from direct contact, which can make healing a little easier.
Premature babies or little ones with weak sucking reflexes sometimes latch better with a shield’s firmer surface. Shields also help babies who struggle with flat or inverted nipples by offering a shape that’s easier to grasp.
Some moms use shields just for a while, especially in the early days. Research suggests that correct shield use can support ongoing breastfeeding—especially with good support from your care team.

How to Select the Best Nipple Shield for Your Needs
Getting the right size is key. The shield’s tunnel should let your nipple move freely, not squish it, but it shouldn’t be so big that your baby can’t get a good latch.
To measure, grab a ruler and check your nipple’s diameter at the base after pumping or feeding—when it’s at its largest. Most shields run from 16mm to 30mm, with 24mm being the size most moms need.
Material matters, too. Medical-grade silicone shields are safest—they’re BPA-free, heat-resistant, and easy to clean. If you or your baby have latex allergies, steer clear of latex shields.
Design features can make a difference. Some shields have cut-outs for more skin contact, while others vary in thickness and sensation. Clinical guidelines warn that the wrong size just doesn’t do the job.
Best Practices for Using Nipple Shields Safely and Effectively
Always start by washing your hands. Clean the shield with warm, soapy water and rinse well. Some moms find that dampening the shield’s edge helps it stick better.
Center your nipple in the tunnel, with the cut-out (if there is one) facing up toward your baby’s nose. The shield should lay flat—no air bubbles under there, or you might lose suction.
Watch your baby’s feeding cues and output. Listen for swallowing, check for wet diapers, and keep an eye on weight gain. Studies show that help from a lactation consultant can make shield use a lot smoother.
When things are healing, start weaning from the shield. Try taking it off partway through feeds, or see how things go without it when you and baby are both relaxed.
If you’re unsure, reach out to a lactation consultant or your healthcare provider. They can check your technique, make sure your baby’s getting enough milk, and help you move away from shield use when you’re ready.

Product Highlights and Care Tips
Good nipple shields should feel soft and flexible, but not flimsy. Look for ones that keep their shape after lots of washing and sterilizing.
The tunnel should be smooth, with no rough edges. Irritation is the last thing you need.
Store clean shields in a container or bag to keep them safe. Having a few shields on hand means you’ll always have a clean one ready. Proper storage helps keep things hygienic.
Check your shields regularly for cracks, tears, or discoloration. Most last several weeks with good care, but if you notice any damage, swap them out.
Backup feeding gear can be handy. A reliable bottle warmer is great if you need to supplement feeds while you’re getting the hang of shields.
Clean shields right after each use so milk doesn’t build up. Sterilize daily—boil for five minutes or use a steam sterilizer made for baby products.
Supporting Your Breastfeeding Journey
| Feature | Silver Nursing Cups | Silicone Shields | Breast Pads |
|---|---|---|---|
| Antibacterial | ✔️ Natural silver ions | ❌ No antibacterial effect | ❌ Absorbs moisture |
| Healing Support | ✔️ Promotes faster healing | ❌ Only protective barrier | ❌ No healing benefit |
| Comfort | ✔️ Gentle, cool on skin | ⚠️ May cause suction issues | ✔️ Soft but can get wet |
| Durability | ✔️ Long-lasting (reusable) | ⚠️ Needs replacement often | ❌ Disposable, single-use |
| Eco-Friendly | ✔️ 100% reusable | ❌ Plastic waste | ❌ High waste |
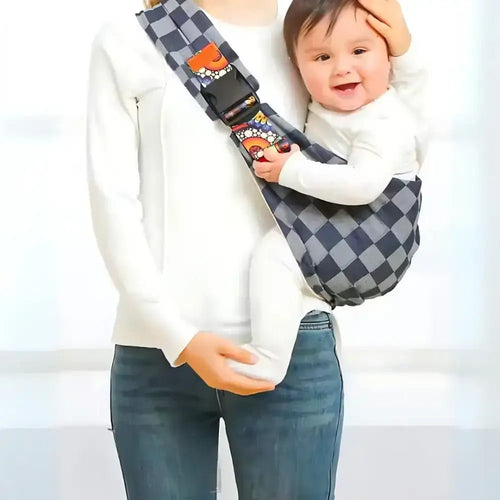
A comfy feeding spot makes a big difference. Find a quiet place with good support for your arms and back. A baby carrier between feeds can keep your baby close and give your nipples a break.
Keep track of feeds and diapers. Pumping after feeds (at least at first) can help maintain your milk supply and show how much milk your baby’s getting.
Connect with other moms who’ve used shields. Online groups and local meetups are full of practical tips and reassurance.

Shield use is usually just a phase. Most moms move away from shields within a few weeks, once things heal or latch improves. Professional breastfeeding support can make this transition smoother.
You might want to try other comfort measures, too. Gentle nipple care and good positioning during feeds can help with healing and comfort.
Understanding Nipple Shields and When to Use Them
Nipple shields act as temporary breastfeeding aids for specific nursing challenges. They help with latch issues and protect sensitive nipples while you heal.
What Are Nipple Shields?
A nipple shield is a thin, flexible silicone cover that fits over your nipple and areola during feeds. There’s a nipple-shaped tip with tiny holes for milk to flow through.
Most modern shields are made from medical-grade silicone that’s safe for you and your baby. Sizes vary so you can find the right fit.
The shield forms a barrier between baby’s mouth and your skin, which is especially helpful if you’re dealing with cracks or soreness.
Key Features:
- Thin silicone construction
- Multiple size options
- Small holes for milk transfer
- Contoured shape for comfort
If the shield fits right, it should cover your whole areola. Your baby latches onto the shield, not directly onto your skin.
For more support, you can check out nursing essentials and feeding solutions that are designed for your comfort.
Common Reasons for Considering Nipple Shields
Healthcare providers usually recommend shields for certain breastfeeding bumps in the road. Clinical guidelines say you should get assessed before starting.
Latch Difficulties Some babies—especially preemies or those with oral differences—just can’t latch well at first. Shields give them a firmer surface to grab onto.
Inverted or Flat Nipples If you have inverted nipples, shields can help draw them out. The shape gives your baby something more to latch onto.
Nipple Pain and Damage Cracked, bleeding, or sore nipples need a break. Shields cut down on direct contact but let you keep nursing.
Transitioning from Bottle to Breast If your baby’s used to bottles, the firmer feel of a shield can sometimes make the switch back to breast a bit easier.
WHO guidelines say it’s best to address feeding issues early. That way, you set yourself up for long-term breastfeeding success.
For comfort between feeds, silver nursing cups can gently protect your nipples and support healing.
Short-Term vs Long-Term Use
Nipple shields are meant for short-term use, not forever. Knowing the timeline helps you avoid getting stuck with them longer than needed.
Short-Term Use (Days to Weeks) Most moms use shields for a few days or weeks—just enough time for nipples to heal or babies to get stronger.
With good guidance, moms often transition away from shields more easily.
Weaning Process Start by removing the shield partway through feeds, or try some feeds without it when you’re both calm.
Long-Term Considerations Using shields for too long might affect your milk supply. The barrier doesn’t give your body the same natural stimulation.
How to Know It’s Working:
- Baby’s gaining weight
- Milk flows well
- Less discomfort for you
- Feeds feel more manageable
Regular check-ins with your provider can help you track progress and plan for weaning. The American Academy of Pediatrics recommends professional support throughout.
Traveling? A portable bottle warmer can help keep your routine on track if you need to pump.
How to Select the Best Nipple Shield for Your Needs
Getting the right fit, material, and shape can mean the difference between relief and ongoing hassle. Professional support helps you pick shields that match your goals and keep your milk supply steady.
Sizing and Fit: Getting It Right
| Size (mm) | Common Use | Signs It Fits | Notes |
|---|---|---|---|
| 16 mm | Small nipples | No rubbing, baby latches deeply | Often used for preemies |
| 20 mm | Average nipples | Milk flows smoothly | Most common hospital size |
| 24 mm | Larger nipples | Comfortable, no pinching | Most frequently purchased |
| 28–30 mm | Extra-large nipples | Baby maintains suction | Less common, check with LC |
Nipple tunnel diameter matters most. Most moms need 20mm–28mm, with 24mm as the most common.
Your nipple should move freely in the tunnel, not rub or get squished. Too small? It’ll hurt and slow milk flow. Too big? Air gaps can mess up suction.
How to Measure:
- Measure your nipple’s base after feeding or pumping
- Remember nipples swell during feeding
- Adjust for any engorgement
Brands have their own sizing. Medela contact nipple shields come in 16mm, 20mm, and 24mm. MAM offers 21mm and 24mm sizes with extra-soft silicone.
Signs Your Shield Fits:
- Nipple doesn’t touch tunnel walls
- Baby gets a deep latch over the shield base
- Milk flows easily
- No pain or pinching
Sometimes, each breast needs a different size. That’s normal—bodies aren’t always perfectly symmetrical.

Takeaway: Nipple shields can be a real help for sore nipples, latch issues, or tricky feeds. With the right fit and a little support, you can use them safely and comfortably—then move on when you and your baby are ready. And don't forget, silver nursing cups between feeds may offer soothing comfort while your body heals.
Material and Safety Considerations
| Material | Safety | Comfort | Durability |
|---|---|---|---|
| Medical-grade Silicone | BPA-free, FDA-approved | Soft, natural feel | High, withstands sterilizing |
| Latex | Allergy risk | Soft, but less safe | Moderate, degrades with use |
| Rubber | Not recommended | Too firm, irritates skin | Poor, cracks easily |
| Plastic | Unknown chemicals | Uncomfortable | Stiff, not long-lasting |
When you’re choosing a nipple shield, medical-grade silicone is usually the safest bet. It’s BPA-free, latex-free, and made for long stretches of skin contact during feeding.
Quality shields feel soft and flexible, but not flimsy. Thin silicone lets milk flow more naturally and keeps feeding feeling close to the real thing.
If a shield’s too thick or stiff, it can mess with your baby’s latch or slow down milk flow. You want something that feels right for both of you.
Look for shields with these safety features:
- FDA-approved materials
- Smooth edges, no sharp seams
- Surfaces that are easy to clean
- Transparent or clear design so you can see milk transfer
Try to avoid shields made from rubber, latex, or any mystery plastics. Those can have chemicals you don’t want near your baby, and some folks react to them.
Cleaning routines depend on the shield’s material. You can sterilize silicone shields by boiling, using a steam sterilizer, or with cold water sterilizing solutions.
It’s a good idea to swap out your shield every 4-6 weeks if you’re using it daily.
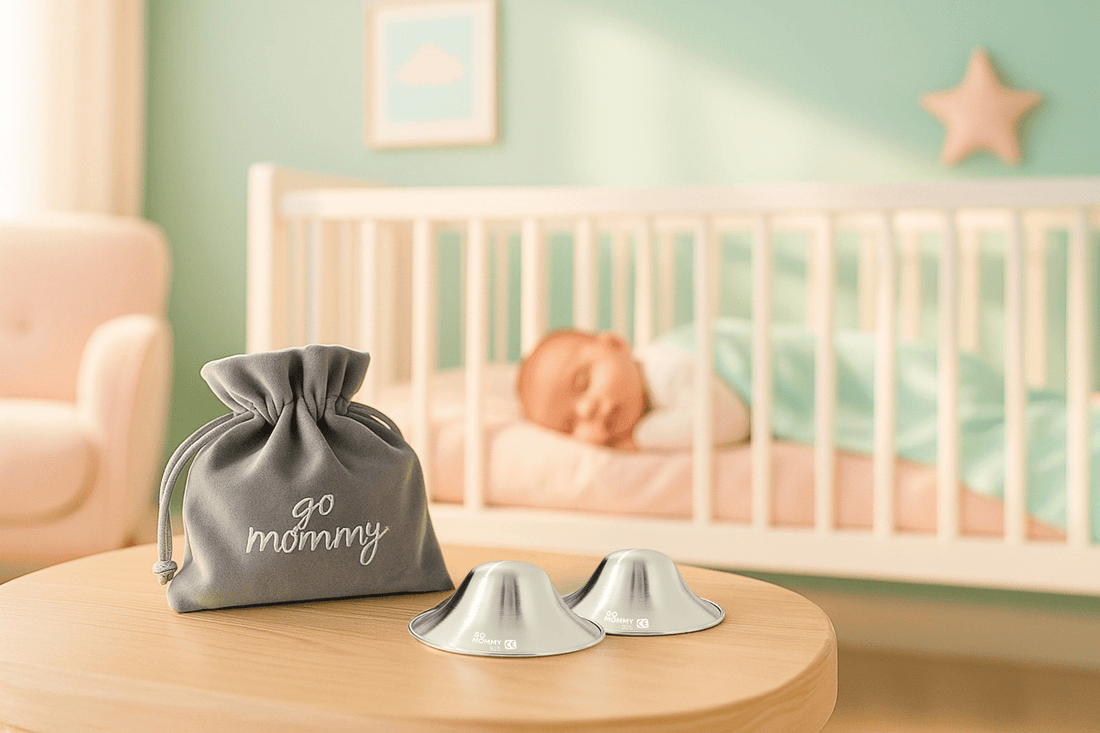
Some moms find silver nursing cups helpful between feedings. They offer soothing relief and extra protection when the shield’s off.
Takeaway: Choose medical-grade silicone, keep things clean, and swap out shields regularly. Silver nursing cups can add comfort between feeds.

Choosing Based on Shape and Flow
The shape of a shield really matters. Cone-shaped shields work for most, but contact shields with cut-outs let you and baby have more skin-to-skin contact.
Contact shields curve to fit your breast, letting your baby smell your skin and keep that rooting reflex strong. It’s a little more natural for both of you.
If your milk supply is a bit wild—maybe you have overactive letdown or a slower flow—shield design can make a difference. Some shields help slow things down, while others help your baby get more milk if supply is low.
The holes at the tip of the shield affect how milk flows:
- One hole for steady, gentle flow
- Multiple holes for faster letdown
- Cross-cut openings that adjust to your baby’s sucking
Some shields even have textured surfaces near the base. That can help stimulate your baby’s palate and encourage strong sucking.
Comfort features are worth paying attention to:
- Soft, flexible base that fits your breast
- Smooth transitions between parts of the shield
- Lightweight design that won’t slip or tug
If you’re dealing with sore nipples, shields with a wider base can spread out pressure and feel gentler.
Takeaway: The right shield shape and flow can make feeding easier and more comfortable—for both you and your baby.

When to Consult a Lactation Consultant
Sometimes, figuring out nipple shields just isn’t straightforward. That’s where a lactation consultant can really help.
It’s smart to meet with a consultant before you start using shields. They’ll help you get the right technique and set realistic expectations. Early advice can save you from common headaches.
Consider reaching out if:
- Your baby won’t latch unless you use a shield
- Your milk supply drops while using a shield
- You still have pain even with a good fit
- You can’t seem to stop using shields after things improve
Consultants stick with you through the shield journey. They’ll check your baby’s weight, watch milk transfer, and tweak your approach if needed. Research shows that moms using shields do better with ongoing support.
Follow-ups help track progress and plan for weaning off shields. Most moms eventually move on from shields as things get better.
If shields start to affect how often your baby feeds, their growth, or your milk supply, get help early. Small problems can snowball if left alone.
Having other feeding tools around—like a portable bottle warmer or a comfy baby carrier—can make the whole process smoother. Go Mommy has products to support you on this journey.
Takeaway: Don’t hesitate to get professional support. It can make a world of difference for you and your baby.
Best Practices for Using Nipple Shields Safely and Effectively
Getting the hang of nipple shields takes a little practice. The right fit and technique help you get relief without making things harder.
Proper Application and Positioning
Picking the right size is your starting point. Shields usually come in 16mm, 20mm, and 24mm. You want it snug—not too tight or too loose.
A lactation consultant can help you find the best fit. Your nipple should fill about three-quarters of the tunnel, without touching the tip.
Here’s how to put on a shield:
- Wash your hands well
- Moisten the rim with water or breast milk
- Center it over your nipple
- Roll the base outward over your areola
- Make sure your nipple sits comfortably in the tunnel
Your baby should latch onto the wide base, not just the tip. Good latch technique still matters, shield or no shield.
Watch out for common mistakes—like putting the shield off-center or leaving gaps. These can cut down milk flow and make nipples sore.
Takeaway: The right size and careful application make shield use smoother and more comfortable.
Optimizing Latch and Milk Transfer
Milk transfer can dip when you use a shield, so it’s important to keep an eye on how things are going. Some studies show shields can reduce milk intake compared to direct breastfeeding.
Signs things are working:
- You see your breast moving as your baby sucks
- You hear your baby swallowing
- Your baby seems satisfied after feeding
- Weight gain is on track
Look for rhythmic jaw movements and listen for those little swallows. If your breast tissue around the shield moves with each suck, that’s a good sign.
Tips to help with milk transfer:
- Double-check shield fit and placement
- Try breast compression while feeding
- Switch sides if your baby slows down
- Take the shield off briefly to get letdown started
If you have overactive letdown, shields can help slow things down for your baby.
Silver nursing cups can give you comfort between feeds. Keep them clean and store in an airtight bag to avoid tarnish.
Takeaway: Monitor feeding, tweak your technique, and use tools that make you comfortable.
Skin-to-Skin Contact and Bonding
Nipple shields can get in the way of skin-to-skin contact, but you can work around that. Bonding doesn’t have to take a back seat.
Ways to keep skin contact:
- Hold your baby against your bare chest
- Use shields only during feeds, not between
- Take shields off right after nursing
- Spend time skin-to-skin when not feeding
Bonding boosts the hormones that support milk supply and emotional connection.
Other bonding ideas:
- Baby wearing between feeds
- Skin-to-skin during bottle feeds if you’re supplementing
- Bath time cuddles
- Extra holding and gentle massage
Some moms worry shields will hurt their breastfeeding journey. Actually, research suggests shields can help you keep breastfeeding when things get tough.
Remember, using a shield doesn’t make your connection with your baby any less special. The closeness and nourishment still matter, no matter how you feed.
Takeaway: Stay mindful of bonding, and use shields as a tool—not a barrier—to closeness.
Transitioning Away From Nipple Shields
| Week | Recommendation |
|---|---|
| Week 1–2 | Offer the breast without the shield at the start of feeds. |
| Week 3–4 | Take the shield off mid-feed after letdown begins. |
| Week 5+ | Use the shield only for tricky feeds. |
It’s a good idea to start thinking about weaning off shields within the first few weeks. Most babies can move on once latch or nipple issues settle down.
Look for these signs:
- Your baby’s sucking is strong
- Latch problems have improved
- Nipple pain has eased up
- Baby’s gaining weight steadily
Try a gradual approach:
| Week 1-2 | Offer the breast without the shield at the start of feeds | | Week 3-4 | Take the shield off mid-feed after letdown begins | | Week 5+ | Use the shield only for tricky feeds |
Some babies switch quickly; others need more time. Lactation support can help you through the process.
Signs you’re on the right track:
- Baby latches without fussing
- Milk transfer stays solid
- Feeds feel comfortable
- Baby keeps gaining weight
Don’t yank the shield away all at once—gentle, patient steps work best.
Keep some feeding supplies handy in case you need to supplement. A portable bottle warmer helps you stick to routines during the switch.
Stay in touch with your healthcare team as you transition. They’ll help you and your baby adjust smoothly.
Takeaway: Weaning off shields takes time and patience. Support and backup plans help you feel confident.

Product Highlights and Care Tips
Not all nipple shields are created equal. Brands, fit, and materials can make a big difference in comfort and ease of use.
Popular Brands and Shield Types
Medela Contact Nipple Shield is a top pick for many moms. It’s thin, comes in different sizes, and lets you and your baby have some skin-to-skin contact.
Medela offers:
- Small (16mm): For smaller nipples
- Medium (20mm): Most common
- Large (24mm): For larger nipples
MAM Breastfeeding Nipple Shields are ultra-thin and shaped to fit your breast. The curved design feels more natural, and the textured surface helps grip.
MAM shields have:
- Extra grip from the texture
- Wide base for stability
- Cut-out so your baby’s nose touches your skin
Other solid brands include Philips Avent, Lansinoh, and Haakaa. Each has its own take on thickness and base design.
Material matters, too. Medical-grade silicone is the safest bet. Skip latex shields—they can cause allergies. Thinner shields usually transfer milk better, but they can tear more easily.
If you want to explore more breastfeeding support products, there are plenty of accessories that pair well with shields.
Takeaway: Find a brand and style that fits your needs, and don’t be afraid to try a couple before settling.
Cleaning and Storage Guidance
Before you use a new shield, sterilize it by boiling for 5 minutes. Let it cool completely before handling.
For daily cleaning:
- Rinse with cool water after each feed
- Wash with warm, soapy water (mild dish soap works)
- Rinse well to get rid of all soap
- Air dry on a clean towel
Sterilize weekly to keep bacteria at bay. Steam sterilizers or microwave bags can save time if you’re busy.
Store your shields dry, in a clean container. Avoid plastic bags that trap moisture—they’re a breeding ground for germs.
Silver nursing cups add extra protection between feeds. After washing and drying, put them in an airtight bag, squeeze out the air, and tuck them into a velvet pouch to slow down tarnishing.
When traveling, pack shields in a hard case for protection. Bring backups if your baby relies on shields for feeding. It’s one less thing to stress about.
Takeaway: Clean shields thoroughly, store them dry, and keep extras on hand. Good care keeps both you and your baby safer and more comfortable.
Addressing Common Troubleshooting Issues
Poor suction or slipping usually means the shield isn’t the right size. It should fit snugly, but not pinch. You want your nipple to move freely inside the tip while your baby feeds.
Reduced milk transfer can happen if the shield’s too thick or not positioned well. Clinical guidelines for nipple shield use recommend checking your baby’s weight gain if you use shields long-term.
Baby rejection is pretty common when first introducing shields. You’ll probably have better luck if you go slow—try warming the shield in your hands before using it.
Leaking around the edges? That’s usually a size or placement issue. The shield base should lie flat against your breast. Some moms discover they need a different size for each side, which is totally normal.
Cleaning difficulties can be frustrating, especially with sticky residue. A soft brush works well for gentle scrubbing. If you notice stains or damage that won’t come out, it’s time to swap for a new shield.
If you’re stuck or things just aren’t improving, professional lactation support can really help. A good fit and the right technique solve most shield problems.
When to replace shields:
- Tears or cracks
- Stains that won’t wash out
- Lost elasticity
- Strong smells after cleaning
It’s smart to keep a spare shield handy, especially when you’re traveling with your baby. Having backups makes unexpected situations less stressful.
Takeaway
Most shield issues come down to fit, placement, and keeping things clean. Don’t hesitate to reach out for help—you’re not alone.
Nipple tenderness, latch struggles, and feeding difficulties can make breastfeeding tough, especially in those early weeks. Choosing the right shield means thinking about size, material, and how it feels for you and your baby.
Frequently Asked Questions
You probably have a lot of questions about nipple shields—most parents do. Let’s walk through the things you’ll want to know, from sizing and materials to using shields safely.
What factors should be considered when choosing a nipple shield for breastfeeding?
Fit is everything. If the shield’s too tight or loose, it can mess with milk flow and make nipples even more sore. You want the shield to cover your nipple fully but not squeeze the areola.
Material matters, too. Medical-grade silicone is usually the safest and most comfortable choice. It’s flexible, durable, and easy to clean.
Healthcare professionals' attitudes toward nipple shields can vary, so it helps to work with a lactation consultant if you can. They’ll help you figure out if a shield is right for you and get the fit just right.
Why you need the shield also plays a role. If you have flat or inverted nipples, you might need a different style than if your baby is premature or struggling to latch.
Think about how long you’ll need the shield. Some moms use them just for a short phase, while others keep them around longer—so durability can matter.
Takeaway
A well-fitting, good-quality shield supports breastfeeding comfort and milk flow. Reach out for help if you’re unsure.
How do I determine the correct size of nipple shield for my needs?
Most nipple shields come in sizes from 16mm to 28mm, measured across the tunnel opening. You want the base to fit snugly around your nipple without pinching or leaving gaps.
If your nipple rubs the end or fills the tunnel, it’s probably too small—try a size up. The shield should also extend onto your areola, but not so much that it gets in the way or feels uncomfortable.
A lactation consultant can help you find the right fit, often by watching a feed and making adjustments. Some brands have sizing guides, but everyone’s anatomy is a little different.
What works for your friend might not work for you, even if your measurements seem close.
Takeaway
A comfortable, well-sized shield makes feeding easier and less painful.
What are the pros and cons of using a nipple shield for long-term breastfeeding?
Nipple shield use can extend breastfeeding duration for some moms, especially with good support. Many women say shields helped them keep going when latch issues threatened to end breastfeeding early.
Benefits? Shields protect sore nipples, can improve latch for babies with oral restrictions, and boost confidence when you’re feeling anxious. They’re also helpful for premature babies who can’t latch strongly yet.
Downsides include less skin-to-skin contact and the extra cleaning. Some moms worry about getting “stuck” using shields or having a tough time weaning off them.
Research on exclusive breastfeeding duration shows mixed results, but the right fit and ongoing support seem to make the biggest difference.
If you use shields long-term, keep an eye on your milk supply and your baby’s weight. Regular check-ins with your healthcare team help you stay on track.
If you need to pump, something like a portable bottle warmer for travel can be handy on the go.
Takeaway
Shields can be a practical tool, but they work best with the right support and regular monitoring.
Can nipple shields help with sore or cracked nipples, and how should they be used in this case?
Nipple shields can give sore or cracked nipples a break by creating a gentle barrier. Still, they’re not usually the first step for nipple pain.
It’s important to find out what’s causing the soreness—like latch or positioning issues—so you’re not just covering up the problem. Fixing the root cause helps prevent more damage.
If you do use a shield for healing, make sure the nipple sits centered in the tunnel and the base is secure against your areola. Good hygiene is key, especially when your skin’s already sensitive. CDC breastfeeding guidance emphasizes keeping everything clean.
Try to give your nipples some shield-free time between feeds so they can air out and recover. Silver nursing cups can offer extra protection and comfort between nursing sessions.
Keep an eye on healing. If things don’t improve in a few days, reach out to a lactation consultant or your healthcare provider.
Takeaway
Shields may help soothe sore nipples, but solving latch issues and keeping things clean are just as important.
Which material types are best for nipple shields, considering safety and comfort?
Medical-grade silicone is the top pick for nipple shields. It’s flexible, easy to clean, and doesn’t hold onto odors or bacteria.
Silicone shields keep their shape, even after lots of use and sterilizing. They also feel the most natural for you and your baby.
Skip latex shields—they can cause allergies and don’t last as long. Old-school rubber or hard plastic shields aren’t recommended anymore; they can actually make nipple pain worse.
Look for shields labeled BPA-free and FDA-approved. Reputable brands put safety info right on the package.
Ultra-thin silicone shields usually give the best mix of protection and natural feel. Research on nipple shield effectiveness suggests thinner shields help with milk flow, too.
Some shields have textured or contoured surfaces, which might help your baby latch better. Others have cut-outs for easier nose breathing.
Takeaway
The right material keeps things safe, comfortable, and low-effort—so you can focus on feeding, not fussing with equipment.
What are the recommended steps for using a nipple shield properly during breastfeeding?
First, wash your hands well. Make sure your silver nursing cups or nipple shields are clean and dry.
Sterilize the shield before you use it for the first time. This step helps keep things safe for you and your baby.
Takeaway: Clean hands and a sterilized shield make breastfeeding a bit smoother and more comfortable.
Still have questions about silver nursing cups or breastfeeding?
Visit our FAQs for quick answers